Page 2 of 3
Re: Behind the scenes:
Posted: 04 Apr 2013 13:43
by Red Laser
Great tips T-shot
Re: Behind the scenes:
Posted: 11 Apr 2013 12:50
by Thundershot
Keeping it simple:
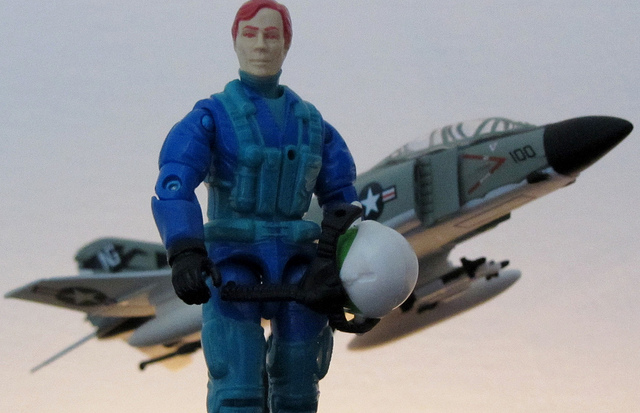
- Fighter Ace 1.jpg (115.94 KiB) Viewed 1932 times
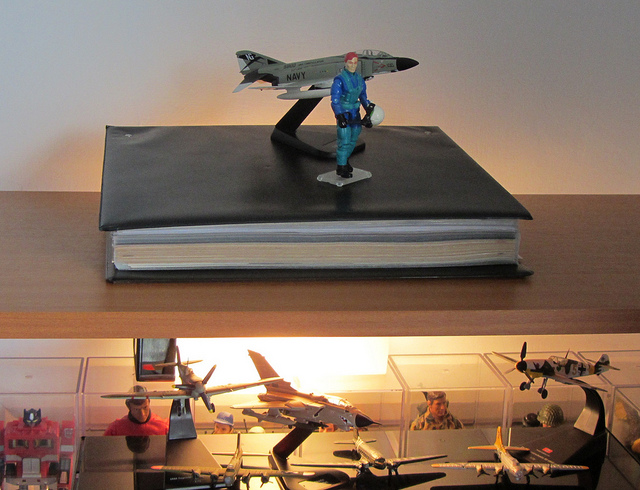
- Fighter Ace 2.jpg (171.13 KiB) Viewed 1932 times
Re: Behind the scenes:
Posted: 11 Apr 2013 13:54
by meertoh
Keeping it effective too!
Re: Behind the scenes:
Posted: 13 Apr 2013 13:18
by Thundershot
Re: Behind the scenes:
Posted: 04 May 2013 17:42
by Squad Leader
Awesome! Still waiting for the book mate


Re: Behind the scenes:
Posted: 04 May 2013 23:48
by Chopper
Amen to that, Paul.
Re: Behind the scenes:
Posted: 05 May 2013 07:58
by paul463
Nicely done. Said before, you are exceptionally talented. Keep ém coming

Re: Behind the scenes:
Posted: 23 Mar 2014 20:47
by Thundershot
Hi folks,
How to create a fun, quick & simple diorama, in 4 easy steps.
Step 1:
Take a couple of shirts, piece of cardboard, Velco (removed from an old army jacket), Figure stand Jeep & a couple of figures.
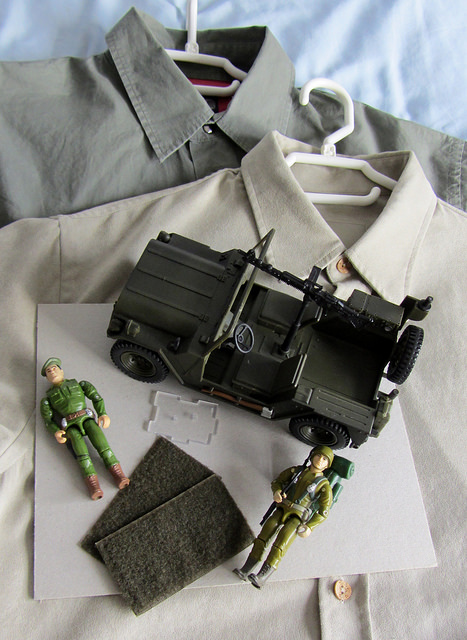
- Jeep 1.jpg (134.99 KiB) Viewed 1889 times
Step 2:
With the above items, make a mess on the floor.
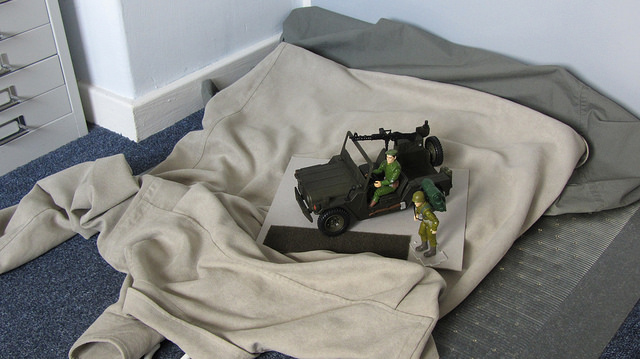
- Jeep 2.jpg (90.45 KiB) Viewed 1889 times
Step 3:
Carefully pose (play) with your toys to create a nice composition then take your camera & shoot loads of pictures (I usually take between 10 & 50), @ every possible angle until you end up with something you find pleasing to the eye.
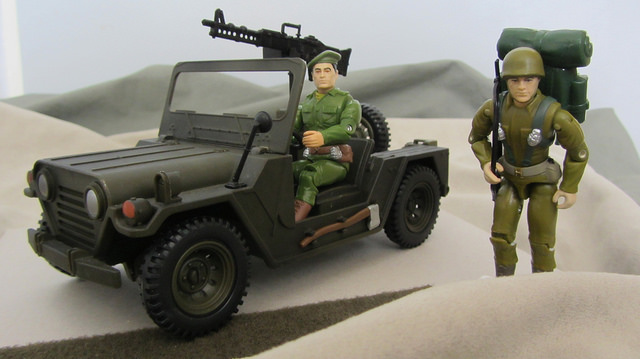
- Jeep 3.jpg (68.65 KiB) Viewed 1889 times
Step 4:
Now take the raw photo & mess around with it using a photo editing programme of your choice, I use Windows Live Photo Gallery & Flickr's 'Avery' (both free), & (optional) add a boarder.
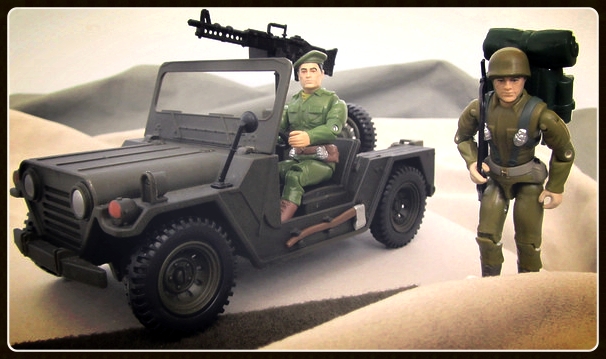
- Jeep 4.jpg (160.5 KiB) Viewed 1889 times
Cheers
T'shot.
Re: Behind the scenes:
Posted: 23 Mar 2014 20:52
by stkhlmdk
So simple and yet so powerfull, thanks for sharing these great tips
Re: Behind the scenes:
Posted: 24 Mar 2014 12:43
by DAMartin
Really looks like sandy terrain!
I always have that kind of mess in my room and never noticed I had a potential diorama